DARE TO BE CREATIVE!

Thursday, February 26, 2015

Keeping It on the "Q.T." Quilting Tip # 3

It's past time for another "Q.T." tip so here is next "Keeping it on the Q.T."  tip.

Tip # 3 - Audition your fabric before you start sewing. 

If you audition your fabric before you take that first stitch, you will save your time and hopefully eliminate using your seam ripper.  Below is an example of how auditioning your fabric will help when making a quilt.

As you know I'm working on a quilt for Quiltmaker's Scrap Squad.  My quilt will be featured in mid March.  I blogged earlier about Tip # 1 selecting the fabrics I would use for the quilt. 

Once my fabrics were selected, I pressed each piece with Best Press.  Mary Ellen's Best Press is a clear starch alternative.  I purchase mine at the local quilt store.  I love it for removing wrinkles and adding crispness to my fabric.


My first cutting involved my scraps. I described the cutting process in  Tip # 2 "selecting the right tools".


Now to AUDITIONING before you sew.

 I had originally thought that my scrappy pyramids would have 4 of the small novelty print pyramids.  See below.
 
Once I saw how the 4 prints looked in the pyramid (auditioning), I decided to change it up a little.  Back in Tip # 1, one of the last things I did in fabric selection was to add a POP of color to the stack of fabric.  It was a bright yellow fabric.  So I decided to audition the yellow in the center of the pyramid. 

 
Now that's better!  I did end up using the back of the yellow fabric.  I felt the front of the fabric was a little too yellow.  I will do a post on looking at both sides of your fabric at a later date.

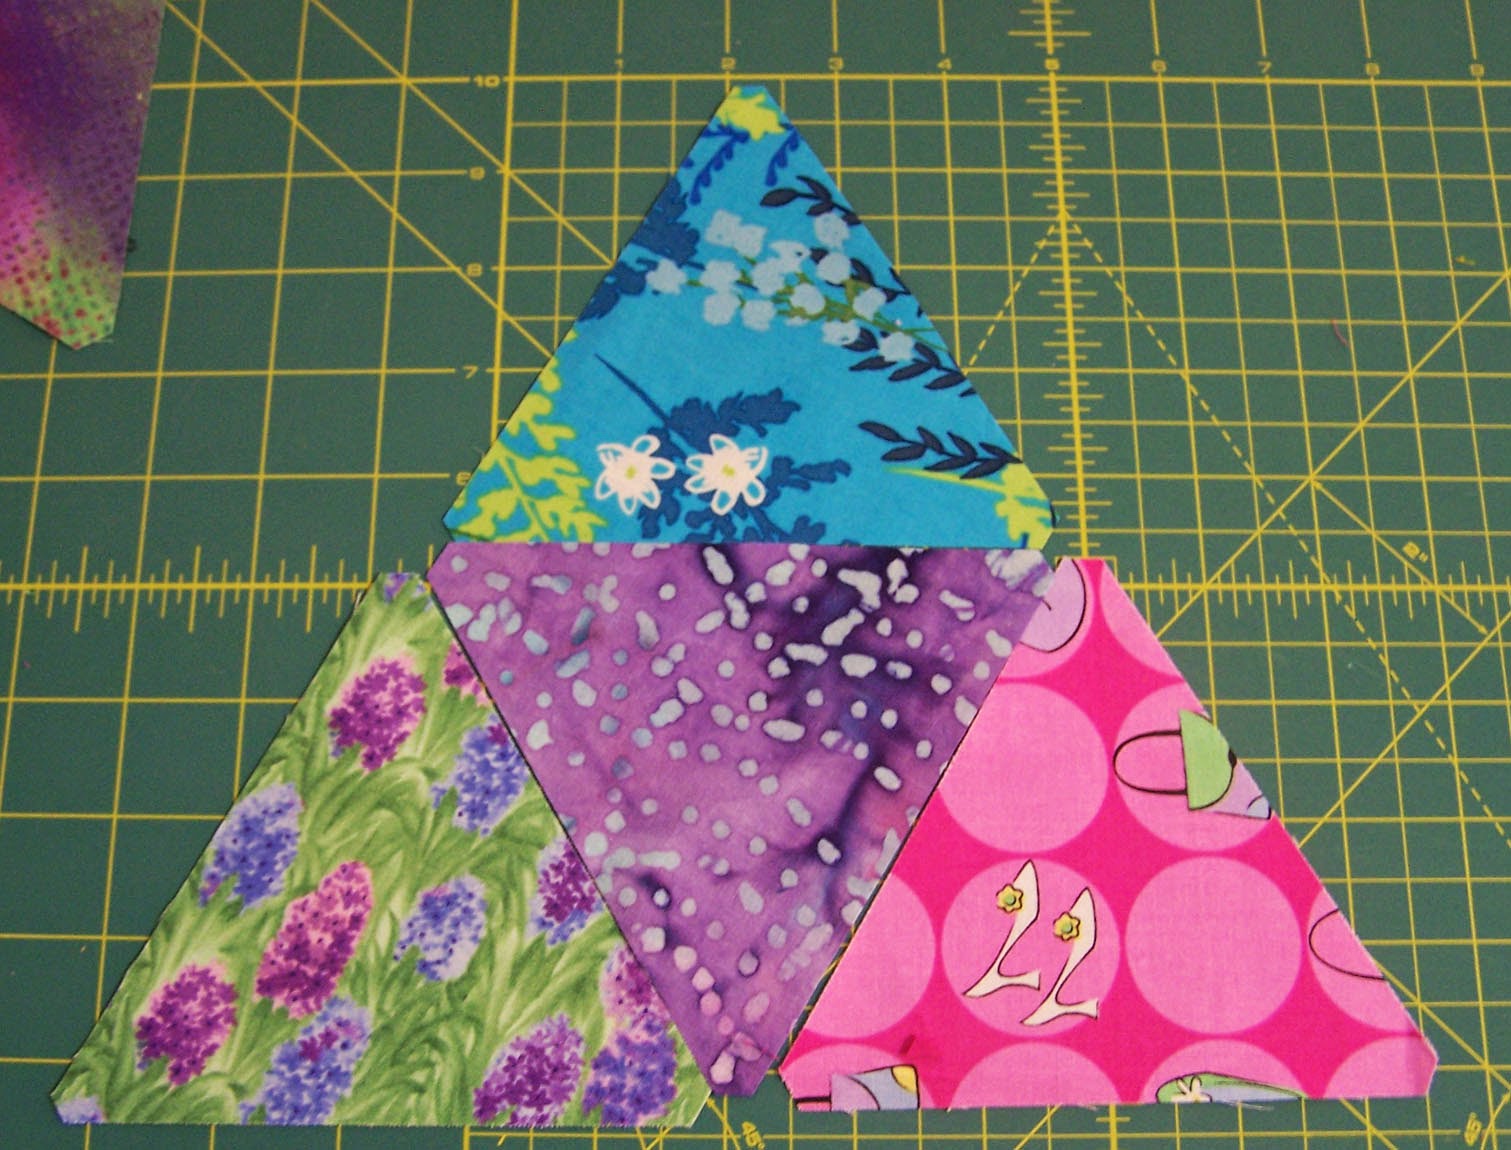
I still can't show you the finished quilt but here are the scrappy pyramids to be used in the quilt.

 
Thanks for stopping by.  For more info on Scrap Squad click on the link at the top of the blog.  Happy Quilting.  Keep checking for more Keeping it on the  "Q.T." tips.

Friday, February 13, 2015

Wishing You a Happy Valentine's Day


A few years ago I found a bag of vintage Valentine cards at the Peddler's Mall in Campbellsville, Kentucky.  When I got them home, I realized that they were all for Mrs. Howell.  Evidently all the students gave Mrs. Howell a Valentine.  Many were teacher Valentines but these two were generic.

I hope each of you has a wonderful day filled with chocolate, flowers, and LOVE!  Enjoy the day.

Tuesday, February 10, 2015

Keeping it on the "Q. T." Quilting Tip # 2

I've been out of the country for a week but now I'm back home and ready to continue my Q. T. Quilting Tips.  ( You can find Tip # 1 here).


Q. T. # 2 "Use the correct tools." 


Use the tools you have in your “toolbox” or your studio.   There are many tools designed just for quilters. 
 
As you know I’m working on a quilt for Quiltmaker’s Scrap Squad (click on link to see my bio).   I can’t share the completed quilt but I am able to tell you that it consists of 60 degree triangles.  Below are the tools I selected to cut my quilt pieces.
 
Paper templates for the triangles were supplied by the magazine.  However, I decided to check my supply of rulers.  I personally don't think there is such a thing as having "too many rulers".  The perfect ruler can make a quilter's life much easier.  I found three 60 degree triangle rulers in my studio.  I ended up using only two of the triangle rulers.  These rulers are sometimes called Pyramid Rulers.  I also used my rotary cutter, cutting mat, and 24" ruler.
 
These are the two specialty rulers I used for my project. 
 
These rulers are designed to be used with strips of fabric.  This quilt pattern called for 4 1/2" and 8 3/8" strips. 
 
The ruler above is the larger ruler used to cut the 8 3/8" triangles.

 
I used the ruler above to cut the 4 1/2" triangles.  These rulers also have makings for half triangles.  Above you can see how I cut the half triangles.
 
 
Above is a half triangle from the larger ruler.
 
 
I love the fact that of both these rulers remove that little "ear" at the top of triangle points. 
 
 
 The larger ruler had all three points removed but the smaller ruler just had the top point removed.  I had to reposition the ruler two additional times to remove those points.  It is worth the time it takes to do this.  Sewing the seams is much easier with the points removed plus I don't have to snip those corners later. 

 
Here are both sizes of triangles ready for stitching.
 
Now I'm ready to start sewing. 
 
Thanks for joining me on my Scrap Squad Journey.