DARE TO BE CREATIVE!

Saturday, September 5, 2015

It's been a long three months!!!!!!!!!!!!!!!!!

It has been over three months since I last posted.  I've experienced some health issues with my right knee.  There have been times when I was unable to walk due to the extreme pain.  Needless to say this put a damper on much of my quilting and sewing.   I should say that I am much better due to a month of therapy.  I'm scheduled to do another month and then evaluation to see if surgery is needed.

I was able to complete a Scrap Squad quilt that was featured on the Quilty Pleasures blog.  The quilt was made from my stash of Christmas fabrics.  It will be on display during the holiday season.

 
I named this quilt Snowy Diamonds.  It was a great way to use up some of those Christmas scraps that I've been collecting for years.


I plan to add more post of projects as time allows. 


Sunday, May 24, 2015

Mini Sampler Swap

It has taken me awhile to post about the Mini Sampler Swap.  You can read about it by clicking the image on the left side of my blog or here.

This is the January sampler I made.  It includes 30s reproduction fabric, a vintage hankie, lace, rick rack, and a flower and button.

 
I received a sampler from Linda.  You can see the sampler on her blog.  I will post a photo of my entire clothes line of samplers later.
 
Here is the sampler I made for Linda in February. The base if from a vintage barkcloth drapery,  I added vintage crochet lace, sequins, and a butterfly.  I also added some mini clothes pins.
 
 
I received a sampler from Heidi that was also on vintage fabric.  I'll post a photo of it later.


Thursday, April 23, 2015

Miss Mattie's Flower Garden


My second Scrap Squad quilt was featured on the Quilty Pleasures Blog last week.  I named this quilt after my MaMa Skaggs.  Her name was Mattie.  You can see the original quilt on the blog post.  I used the original block pattern but rearranged the blocks to get a diagonal line that resulted in large diagonal squares. 
 
I auditioned using the scrappy fabric in the center of squares but ultimately decided to go with a solid gray block in the center.  The embroidery design is by Anita Goodesigns. 
 
I decided to use the left overs to make a scrappy border and quilted on my new Avante quilting machine.  I guess you would called it semi-custom quilting.  I did most of the quilt without using the computer but the triangle blocks are Prostitcher designs.
 

I love this quilt!


Sunday, April 12, 2015

Keeping it on the "Q.T." Quilting Tip # 4

It's time for another Keeping It on the "QT" Tip.  Tip # 4. 

 Painter's Tape is a quilter's Best Friend.

Stitch-and-Flip is a popular quilting technique for attaching corner patches to units.  Instructions usually include something like this "Mark a diagonal line on the patch from corner to corner and sew on the marked line."

For my second Scrap Squad quilt, the pattern called for 192 Stitch-and-Flip units.  That's a lot of diagonal lines!  So I decided to use Painter's Tape to mark my machine instead of marking all those lines.

Why Painter's Tape?  It doesn't leave any sticky mess when you remove it from your machine.  Below you can see the tape on machine.  The tape is placed from just in front of the needle (not over the feed dogs).  Tape should be aligned with the needle.  Most machines will have marking you can use as a guide.


Place your patch on the corner of the unit with right sides together.  Place top corner under presser foot aligned with needle and bottom corner lined up on Painter's Tape.
 
 
Stitch across the diagonal.
 
 
This method works perfectly and you don't have to mark anything.  A real time saver when you are making 192 of these little corners.
 
You would then trim seam allowance to 1/4".  Flip the patch open and press.
 
Thanks for stopping by.  My next Scrap Squad quilt will be featured on Quilty Pleasures Blog on Friday.
 
Happy Scrappy Quilting!!!
 

Tuesday, April 7, 2015

@ the Circus quilt

My first Scrap Quilt was published in March.  Here is a photo of the quilt.


I named the quilt "@ the circus".  I used my Handi Quilter Avante and did an edge to edge quilt design.   Below is a photo of the design.  The design is by Anne Bright.

 
Here is a link to the Scrappy Pleasures Blog post
 
I am now working on my next quilt for Scrap Squad.  It used reproduction 1930s fabric.
 
Here is a peek at the fabric.
 
Thanks for stopping by.


Thursday, February 26, 2015

Keeping It on the "Q.T." Quilting Tip # 3

It's past time for another "Q.T." tip so here is next "Keeping it on the Q.T."  tip.

Tip # 3 - Audition your fabric before you start sewing. 

If you audition your fabric before you take that first stitch, you will save your time and hopefully eliminate using your seam ripper.  Below is an example of how auditioning your fabric will help when making a quilt.

As you know I'm working on a quilt for Quiltmaker's Scrap Squad.  My quilt will be featured in mid March.  I blogged earlier about Tip # 1 selecting the fabrics I would use for the quilt. 

Once my fabrics were selected, I pressed each piece with Best Press.  Mary Ellen's Best Press is a clear starch alternative.  I purchase mine at the local quilt store.  I love it for removing wrinkles and adding crispness to my fabric.


My first cutting involved my scraps. I described the cutting process in  Tip # 2 "selecting the right tools".


Now to AUDITIONING before you sew.

 I had originally thought that my scrappy pyramids would have 4 of the small novelty print pyramids.  See below.
 
Once I saw how the 4 prints looked in the pyramid (auditioning), I decided to change it up a little.  Back in Tip # 1, one of the last things I did in fabric selection was to add a POP of color to the stack of fabric.  It was a bright yellow fabric.  So I decided to audition the yellow in the center of the pyramid. 

 
Now that's better!  I did end up using the back of the yellow fabric.  I felt the front of the fabric was a little too yellow.  I will do a post on looking at both sides of your fabric at a later date.

I still can't show you the finished quilt but here are the scrappy pyramids to be used in the quilt.

 
Thanks for stopping by.  For more info on Scrap Squad click on the link at the top of the blog.  Happy Quilting.  Keep checking for more Keeping it on the  "Q.T." tips.

Friday, February 13, 2015

Wishing You a Happy Valentine's Day


A few years ago I found a bag of vintage Valentine cards at the Peddler's Mall in Campbellsville, Kentucky.  When I got them home, I realized that they were all for Mrs. Howell.  Evidently all the students gave Mrs. Howell a Valentine.  Many were teacher Valentines but these two were generic.

I hope each of you has a wonderful day filled with chocolate, flowers, and LOVE!  Enjoy the day.

Tuesday, February 10, 2015

Keeping it on the "Q. T." Quilting Tip # 2

I've been out of the country for a week but now I'm back home and ready to continue my Q. T. Quilting Tips.  ( You can find Tip # 1 here).


Q. T. # 2 "Use the correct tools." 


Use the tools you have in your “toolbox” or your studio.   There are many tools designed just for quilters. 
 
As you know I’m working on a quilt for Quiltmaker’s Scrap Squad (click on link to see my bio).   I can’t share the completed quilt but I am able to tell you that it consists of 60 degree triangles.  Below are the tools I selected to cut my quilt pieces.
 
Paper templates for the triangles were supplied by the magazine.  However, I decided to check my supply of rulers.  I personally don't think there is such a thing as having "too many rulers".  The perfect ruler can make a quilter's life much easier.  I found three 60 degree triangle rulers in my studio.  I ended up using only two of the triangle rulers.  These rulers are sometimes called Pyramid Rulers.  I also used my rotary cutter, cutting mat, and 24" ruler.
 
These are the two specialty rulers I used for my project. 
 
These rulers are designed to be used with strips of fabric.  This quilt pattern called for 4 1/2" and 8 3/8" strips. 
 
The ruler above is the larger ruler used to cut the 8 3/8" triangles.

 
I used the ruler above to cut the 4 1/2" triangles.  These rulers also have makings for half triangles.  Above you can see how I cut the half triangles.
 
 
Above is a half triangle from the larger ruler.
 
 
I love the fact that of both these rulers remove that little "ear" at the top of triangle points. 
 
 
 The larger ruler had all three points removed but the smaller ruler just had the top point removed.  I had to reposition the ruler two additional times to remove those points.  It is worth the time it takes to do this.  Sewing the seams is much easier with the points removed plus I don't have to snip those corners later. 

 
Here are both sizes of triangles ready for stitching.
 
Now I'm ready to start sewing. 
 
Thanks for joining me on my Scrap Squad Journey.


Thursday, January 29, 2015

January Mini Sampler Swap


When I began blogging in 2007, I was involved in a number of on-line swap groups.  Much of my blogging centered around these swaps.  I have gradually cut back on swaps but when Linda at A Swap for Seasons announced that she was hosting a Mini Sampler Swap for 2015, I knew I just had to be involved.  We swap a mini sampler each month.  No themes - only rule is that is must be 4" x 6" and made of fabric.  Just my kind of swap.

I made the sampler above for Wendy in Missouri.  I used a vintage hankie as my inspiration piece.  The sampler's base is a reproduction 30's print.  I used the corner of the hankie that had both hand embroidery and a hand crochet insert.  Someone spent lots of time making this.  And then it ended up at Goodwill.  Lucky me!
I inserted a small piece of darker fabric behind the embroidery so it would be more visible.  Then I machine quilted around the square.

For embellishments I used a Recollections flower, vintage yellow button, lace, and vintage rick rack. I didn't take a photo of the back but I added a "mini hanging sleeve".  I'm a quilter and every quilt needs a hanging sleeve!

Linda sent me a sampler in January.  I will post about it later.

Wednesday, January 28, 2015

Keeping it on the "Q.T." Quilting Tip # 1

Recently I was selected as a member of Quiltmaker's Scrap Squad.  Monday, we received our first quilt assignment.   I decided to Google the word SCRAPPY -

 Scrappy -  consisting of disorganized, untidy, or incomplete parts:


No one wants a quilt that is disorganized, untidy or incomplete.  So how do you use scraps in a quilt and keep it organized, tidy, and complete.  Well here is Q. T. # 1.

"Choose an inspiration fabric and let it be  your guide."

I began by looking through my stash of fabric.  The fabric below had been in my stash for a few years waiting for the perfect quilt.  I decided to use it as my inspiration fabric.

It is a hand dyed fabric.  Not sure how I will use it in the quilt but it will serve as my guide for selecting scraps of fabric.  After looking at the inspiration fabric, I remembered that I had recently purchased a small amount of various colors of hand dyed ombre fabrics.  I placed then on the inspiration. 
I eliminated the gray and red fabrics. The gray was completely wrong and the red was a little too red.  (not pinkish enough)
I decide to go with these six colors.  Again I'm not sure how I will use them but I added them to my stack.
 
Now comes the fun part, gathering together my scraps.  Since this is the Scrap Squad the scraps will be the focal part of the quilt.
I began by going through my scraps and selecting fabrics that were similar in color to the six colors above.
 
 
I auditioned each fabric and some were eliminated as was the yellow fabric shown below.  It has similar colors but was too yellow.
 
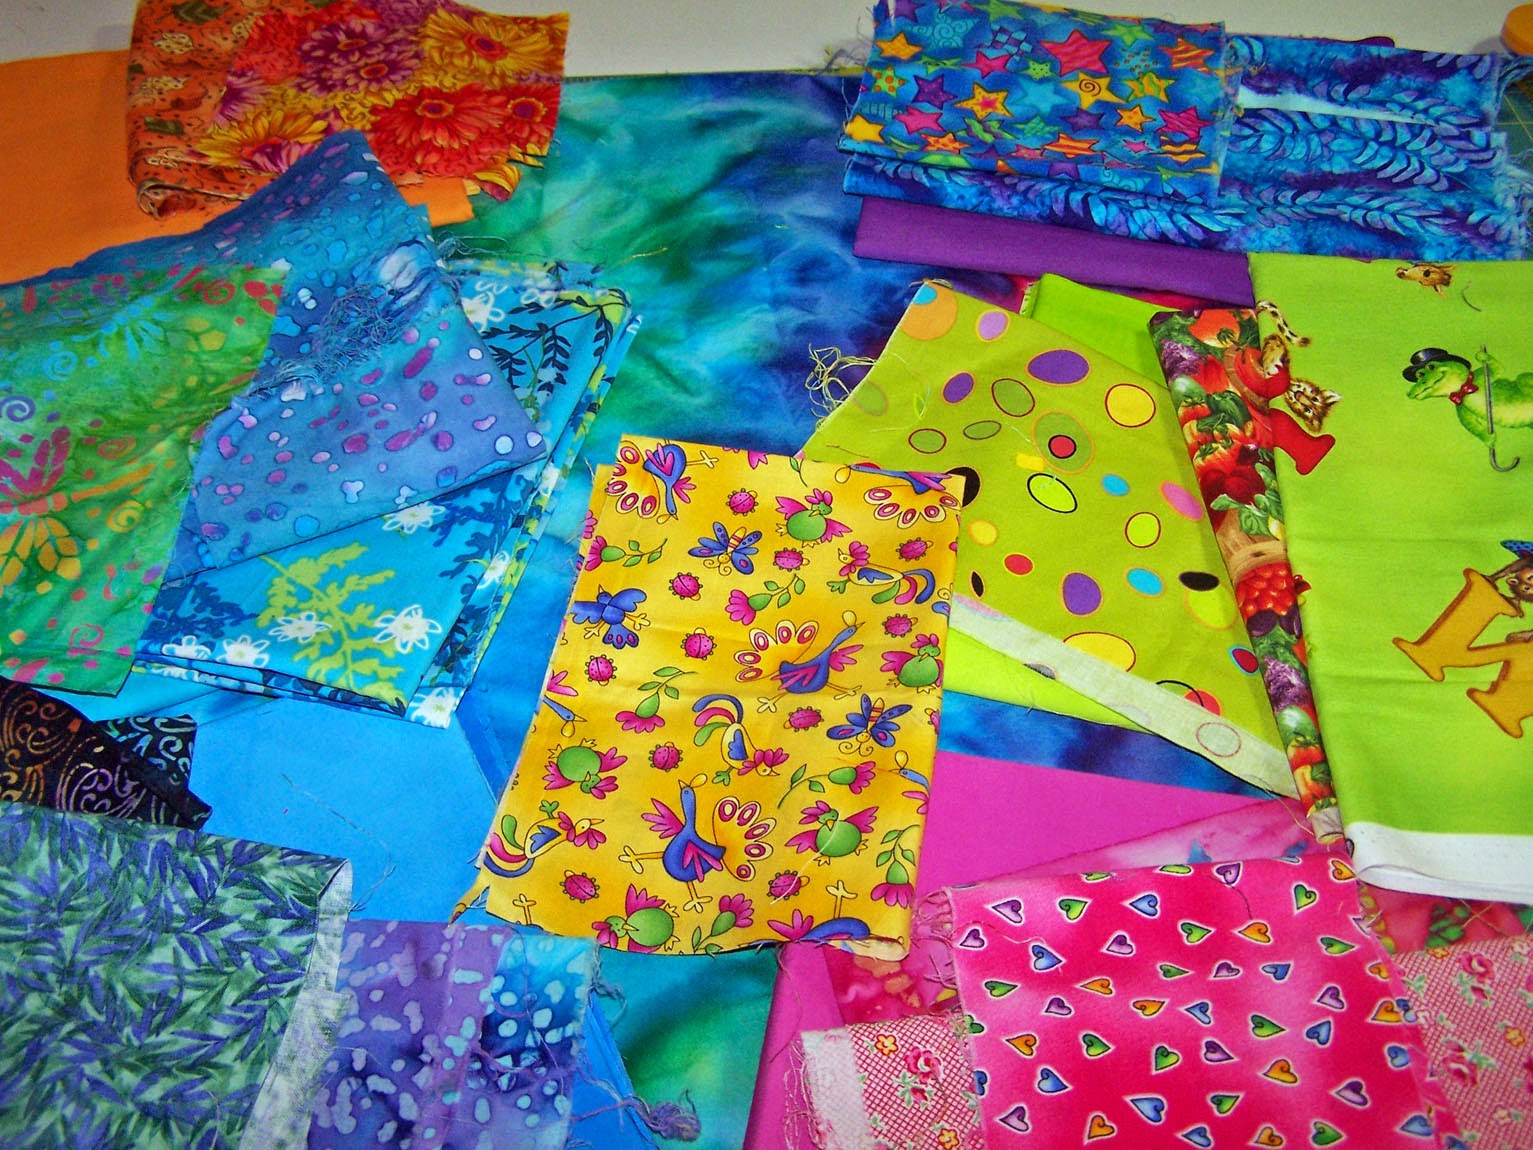
I have a maybe "pile" of scraps. You can see them at the top of the photo below.  I can always go back and add then to the mix if I choose.
 
If you are having trouble deciding whether or not to use a certain fabric, sometimes it helps to take a photo and look at the photo.  It can give you another point of view.  Here I used my IPad and took a photo. I eliminated a few fabrics after viewing the photo.
 
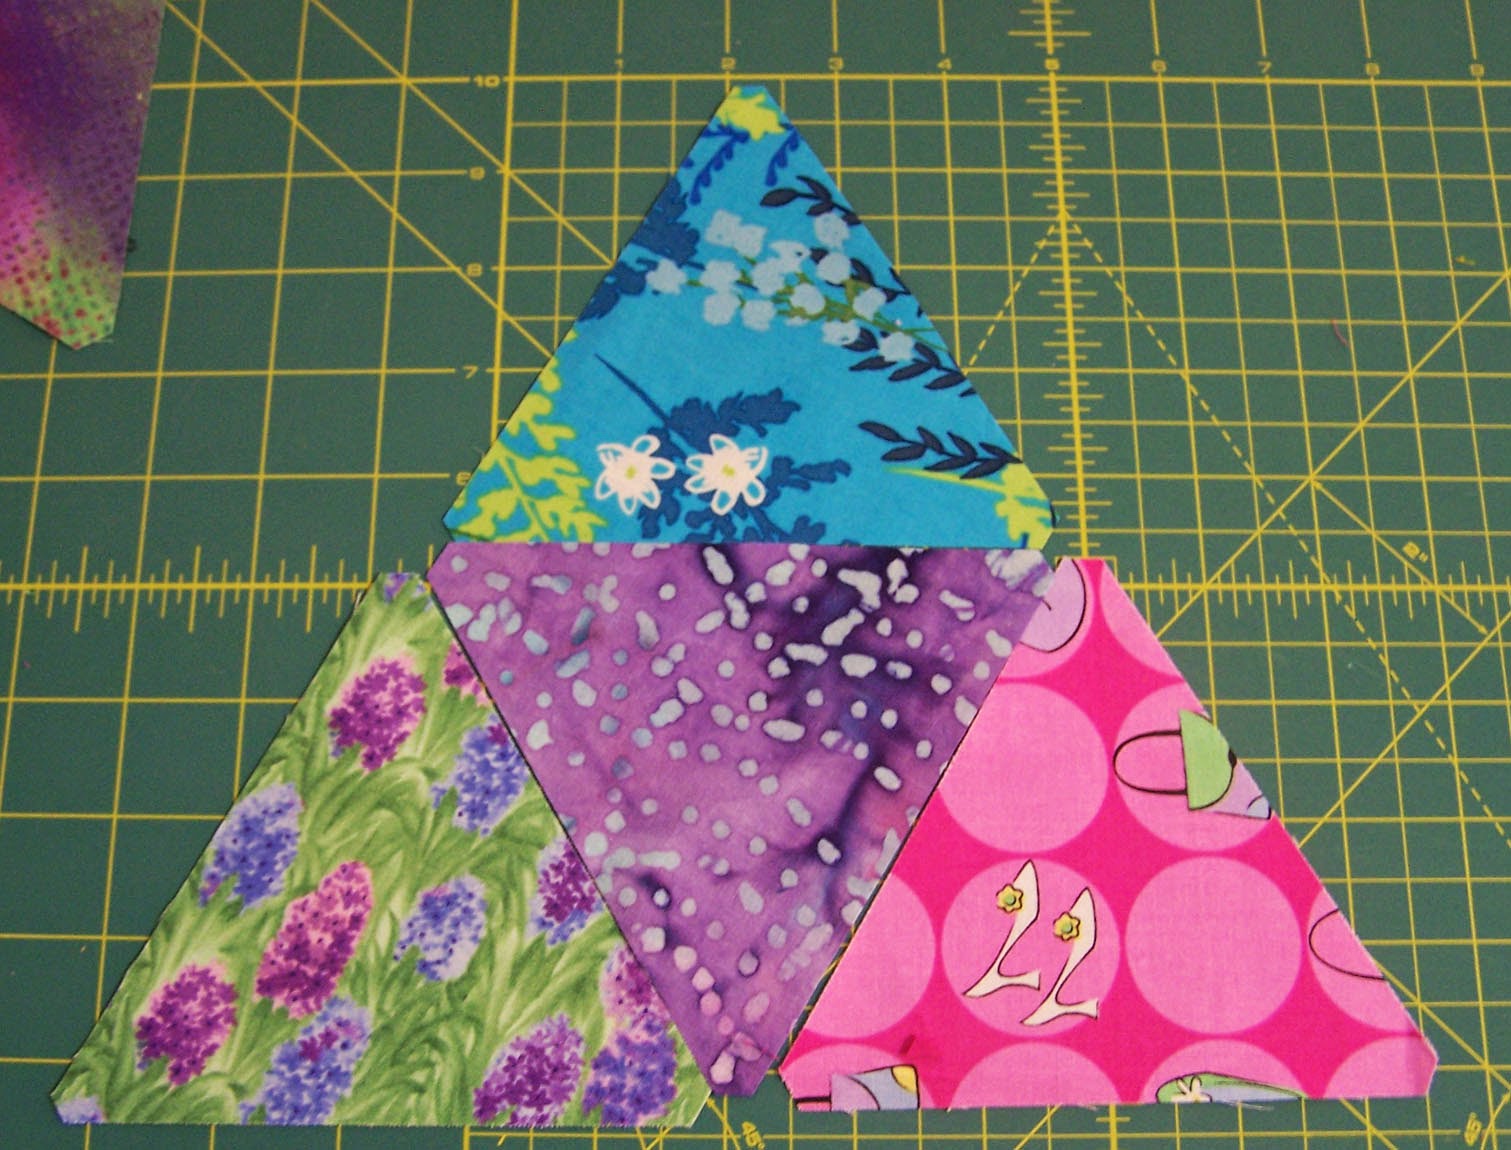
Below is my final selection of scraps.  You will notice that I eliminated the orange ombre and one of the blues.  I also eliminated the orange scraps and combined all the blues into one stack.  Now I have my inspiration fabric, 4 ombre hand dyes, and my scraps in four piles.
 
All of these selections were based on my one inspiration fabric.   I have found this to be a simple and effective means of selecting a variety of scraps for my quilts. 
 
 
My final stack of scraps
And I didn't add in any of my "maybe" fabric this time but often I do go back and revisit those fabrics.  This time I had enough variety without them. 
 
Hope you enjoyed my Keeping it on the "Q.T." Quilting Tip # 1.
 

"Let an inspiration fabric be your guide."

Oh yes! Leave your fabric out on your table for a few hours or days.  Walk by and see if you are concerned about any of the fabrics or if something is missing.  After doing this, I decided I needed a POP of COLOR.  Referring back to my inspiration fabric, I decided to add yellow as my POP.
 
 
Remember, I still don't know how I will use these fabrics but my quilt design is beginning to come into focus.  I'm pleased with the fabrics I selected and know that they "fit together".  Now the quilt  design will begin to take shape.   I won't be able to share the quilt pattern until my quilt is revealed in March but I will share more later as I make design decisions.


Monday, January 26, 2015

Quiltmaker Scrap Squad 2015

QM scrap squadB3 Scrap Quilt Ideas: Emilys Silver Lining
I've been selected as a member of Quiltmaker Magazine's 2015 Scrap Squad.  I'm so excited.  I received my first assignment today and I'm already planning the quilt.  I plan to do a "Keeping It on the Q.T." (Quilting Tips) here on my blog.  I'll probably do a couple of "Q.T." tips each month.  I'm busy planning my first post for late this week. 

We were to submit a few pictures for use on the Quiltmaker blog.  I'm not sure which photo they will select but I've chosen this one for my post here.
 
Check back often as I blog about my experiences as a member of the Scrap Squad.

Western Themed Towels


Christmas 2014 was a Hand Made by Pam Christmas at our house.  Everyone received something handmade.  I shared the mug rugs for nieces and nephews earlier.  Today I am sharing a set of Western themed Christmas towels I made for my sister.  She recently decided to decorate her home with a Western Theme.  This embroidery by Anita Goodesign was a perfect fit. 

The towels were purchased from Bed, Bath and Beyond and embroidered on my Janome 15000.  I love that machine with it's large hoops.  Below you will see each individual design. 

Bath Towel
Hand Towel
Wash Cloth
 
If you are a machine embroidery person, you know that sometimes it is difficult to embroidery with metallic threads.  I have found that the Janome 15000 does a wonderful job using metallic threads. 
 
This was a fun project and my sister loved her towel set.  She wants another set!!!!

Tuesday, January 20, 2015

Magical Slice and Dice Now Quilted


I first posted about this quilt a year ago here.  I finally had a chance to quilt the top on my new Handi Quilter.  I decided to quilt each block with a feather design.  I used it as an opportunity to center and skew my quilting designs.  It took awhile but I'm pleased with the results.

 
I even learned to add triangles to the outer triangle sections. 

Once I had quilted the blocks and triangles, I decided that I needed a little something in the corners where the blocks meet.  So I added a simple little leaf.  Hope you can see it in the left corner of this pictures.

The quilting actually shows up better on the back of the quilt.  I'm pleased at the results of my very first Pro Stitcher quilt.  Hope there are many more to come.  There is so much to learn about Flora but she is very cooperative!  I'm naming the quilt Golden Lavender and it will be a surprise gift for a very special young lady. 

Monday, January 12, 2015

Some Christmas quilting


These are mug rugs that I made for Christmas for nieces and nephews.  They are essentially mini quilts.  I found the pattern on-line.  I had the perfect fabric in my stash.  It was a kit I bought a few years ago for a Christmas tablerunner.  I didn't make the tablerunner and the fabric was perfect for these little mug rugs.

I added the names with my embroidery machine and found the perfect mugs at the Dollar Tree.  Everyone loved their little mugs and matching rugs.  Perfect for that hot beverage and a little treat.


Here they are checking out their gifts.  This year I decided to make all the Christmas presents for the family.  I'll share more of my creations later this week.